When it comes to creating engaging and professional-looking Google Forms, the header image plays a crucial role. Whether you’re designing a survey, collecting event registrations, or gathering feedback, a well-chosen header image can set the tone and make your form stand out. In this guide, we’ll explore everything you need to know about adding header images to your Google Forms.
Why Use Header Images?
Enhancing Branding and Aesthetics
Header images provide an opportunity to reinforce your brand identity. Whether you’re representing a company, an event, or a personal project, a consistent header image across your forms creates a cohesive experience for respondents.
Improving User Experience
A visually appealing header captures attention and makes your form more inviting. It sets the context and prepares respondents for what’s to come. Plus, a well-designed header can make even the most mundane forms feel polished and professional.
Choosing the Right Image
Relevance to Form Purpose
Consider the purpose of your form. Is it a customer feedback survey? An event registration form? Choose an image that aligns with the form’s topic or theme. For example:
- Event registration: Use an image related to the event (e.g., conference venue, concert stage).
- Feedback survey: Consider using your company logo or an abstract image that represents your brand.
Image Dimensions
Google Forms recommends header images with dimensions around 1600 x 400 pixels. Keep it high-resolution to ensure clarity on various devices.
Consistency with Branding
If you’re creating forms for your organization, maintain consistency. Use colors, fonts, and imagery that reflect your brand guidelines.
Step-by-Step Guide: Adding a Header Image
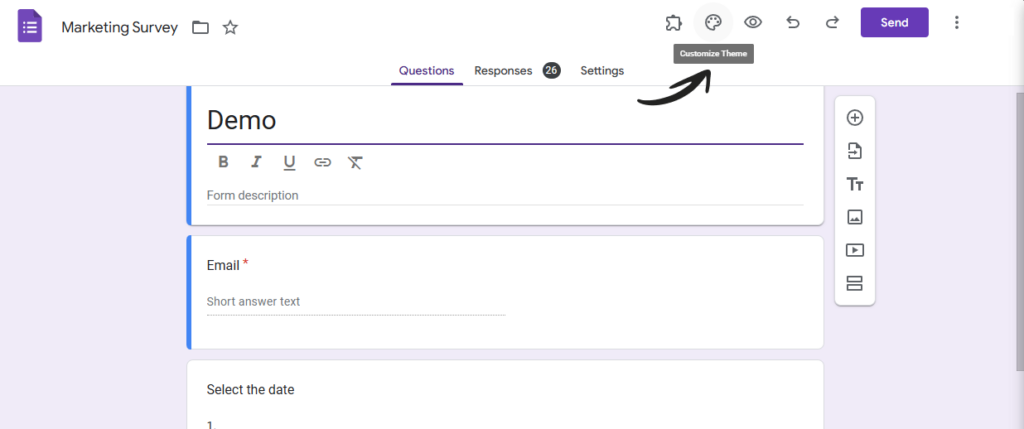
1. Access the Google Forms Editor:
- While editing your form, click the paint palette icon located in the top-right corner. This opens up the customization sidebar.
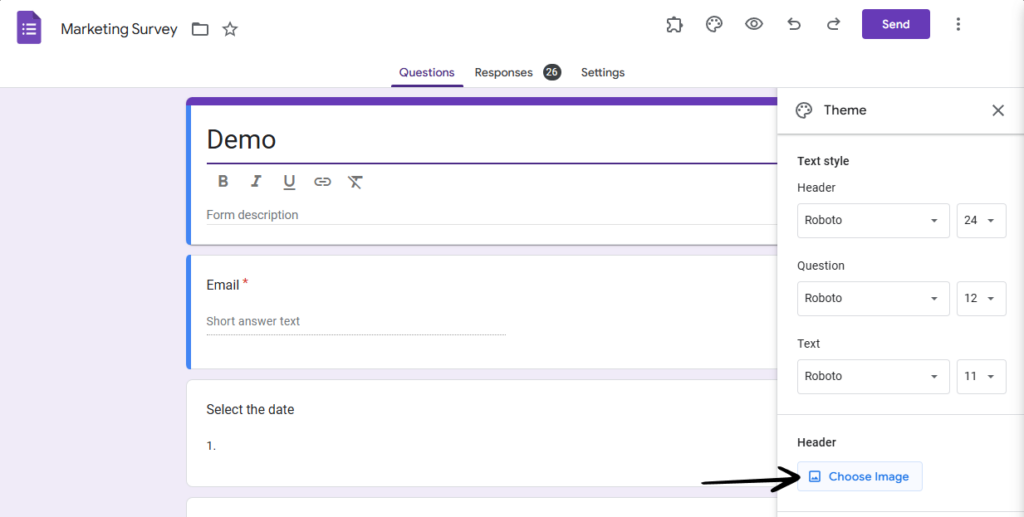
2. Choose Your Header Image:
- In the sidebar, you’ll find options to change the theme and background colors.
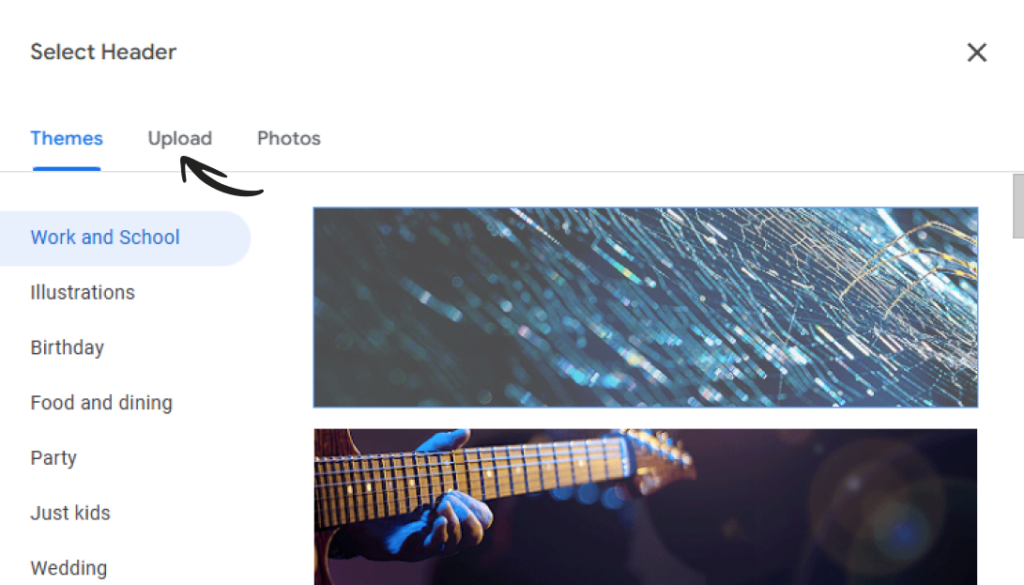
- Click “Choose image” to add your own custom header. You have several choices:
- Select from the existing library of included images.
- Upload an image from your desktop.
- Import images directly from your Google Photos account.
3. Aspect Ratio Consideration:
- If you’re using your own custom header image, be aware of Google Forms’ recommended aspect ratio: 4:1 (1600×400 pixels).
- You’ll need to crop your image accordingly to fit this ratio.
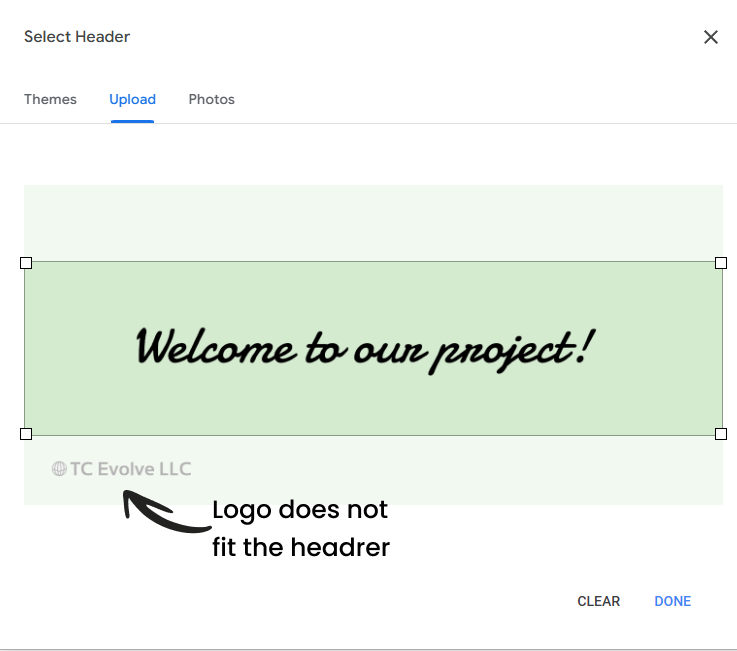
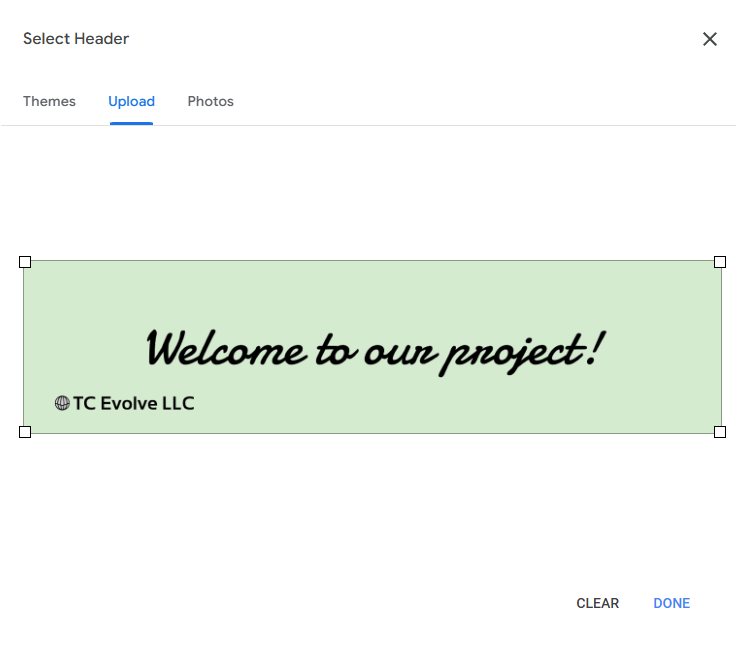
4. Stock Themes vs. Custom Headers:
- Google Forms provides preset themes with images already cropped to the required aspect ratio. These themes are suitable if you’re okay with generic artwork or stock images.
- However, if you want to showcase a specific photo or your brand logo, you’ll need to create a custom header.
Addtional Customization and Best Practices
Form colors
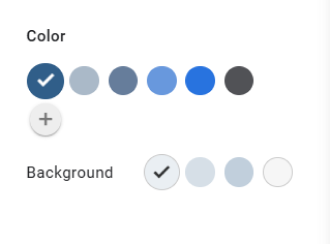
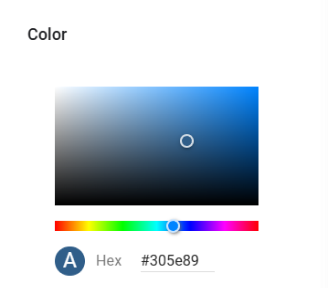
While in the Theme settings, explore color options. Coordinate the form colors with your header image for a harmonious look. To do that, click the Pallet Icon > Locate the sections color > Select the given color options OR add the ones that work for your needs
Keep it clean
- Avoid clutter in your header image. Simple and uncluttered visuals work best.
- Ensure the image doesn’t distract from the form’s content.

Readability Matters
- If your header includes text, make sure it’s legible.
- Test the form on different devices to ensure readability.
Stay updated on your forms
- Set up email notifications for your Google Forms
- Take advantage of the solutions like Form Notifier that allow you to receive/send customizable email notifications, store form responses in Google Docs and Sheets. The tool 100% free and provides all the features.
Conclusion
Adding a header image to your Google Forms is a small step that can make a big difference. It’s an opportunity to leave a positive impression on respondents and elevate your form-building game. So go ahead—get creative, upload that stunning header, and make your forms memorable!


