There is a boundless number of use cases of Google Forms, such as contact-us forms, service request forms, lead capture forms, onboarding surveys, and much more. However, the most common use case scenarios of Google Forms are quizzes and surveys. In this guide you’ll learn how to properly set up Google Forms for quizzes, surveys, and more. You’ll also find out addition tricks to improve your experience with Google Forms.
What is Google Forms?
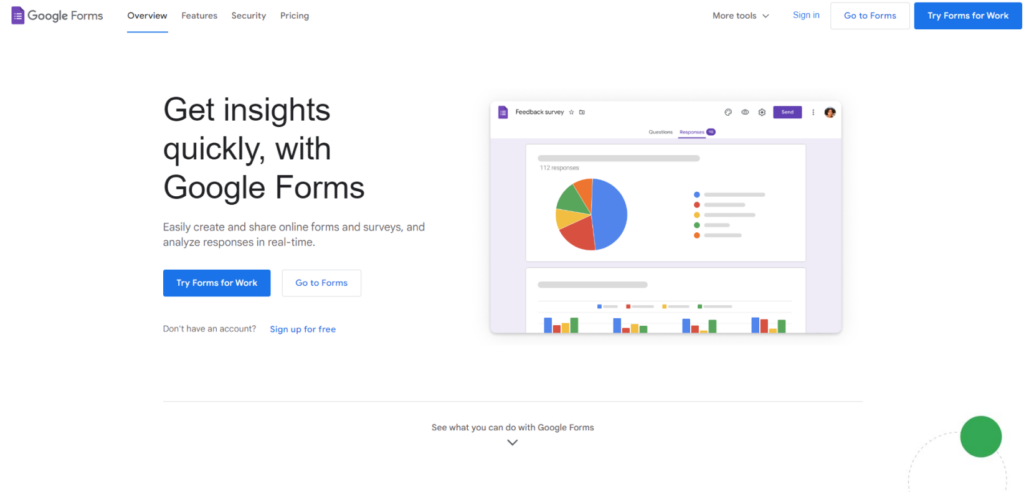
If you haven’t heard of Google Forms, it is a free web tool for various kinds of forms, such quizzes, surveys, questionnaires, and much more. It also allows you to conducts various research projects, polls, or even gather data from the set of users.
Google Forms allows you to analyze the responses and the results of your projects in real-time. Moreover, you can convert your results to Google Sheets. The tool is part of the core line of Google Workspace Apps, which includes such household names as Google Docs, Google Sheets, Google Drive, etc. In order to access Google Forms, you can either use your personal account or your corporate email.
Google Forms was initially part of Google Sheets, and it came to life in 2008. The service implied the use of spreadsheets for surveys, while the results were collected in another spreadsheet. Over the time, the Google Sheet plugin evolved into a separate application. You can now easily access your responses, create flexible surveys, and collaborate with your team in real-time. The further the development went, the more functions were brought. One of the key features were the add-ons for Google Forms that enabled third-party developers to expand the set of available features. This update allowed users to mitigate some of the drawbacks of the tool.
The key features that were brought by the third-party add-ons is a more flexible notification system. The best solution Google Forms notifications is Form Notifier that was developed by AppsRecord. The plugin allows you to leverage the full potential of your Google Forms. You can set up flexible rules for notifications to stay informed only when the specific information was mentioned in the responses, set up thank-you emails for the respondents, and much more.
Google Forms Fields Overview
Before starting with the process of creating quizzes and surveys we need to go through the key fields that are available in Google Forms. The understanding of how each field function works and what it’s used for will allow us to better understand the tool’s functionality.
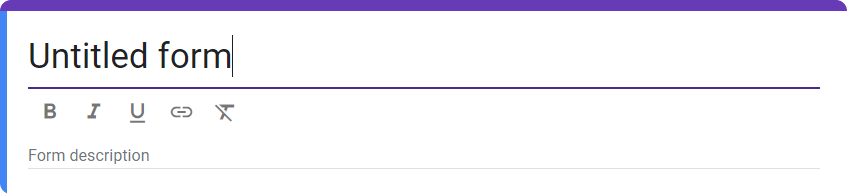
Title and description: The first point of your form is the title and the description. Form description can be left blank but we still suggest adding it for better organization of your form. 1-2 sentences will be enough. You can also add extra Title blocks at any point of your form by clicking the Tt button. It might be useful when you want to separate some of the sections of your form. Keep in mind that Google Forms allow you to add links to your description. This way, your recipients can go to the provided web resources and much more.
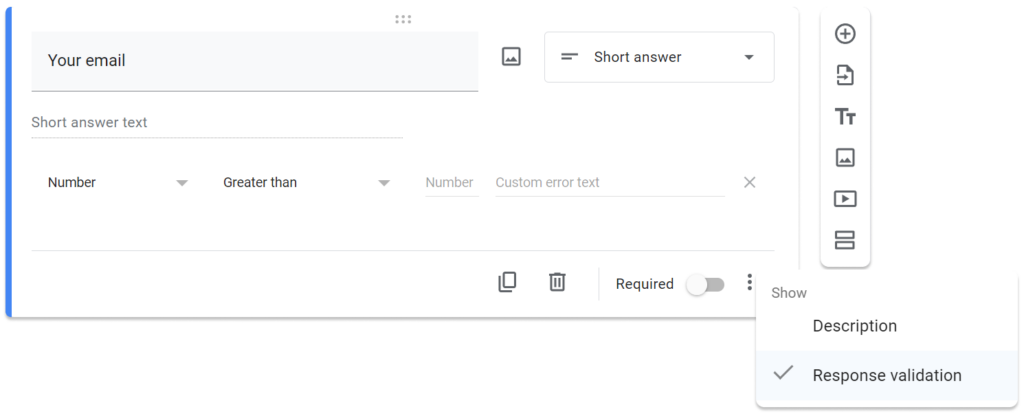
Short answer: The field is the primary option in Google Forms. Short answers are mainly used when you request a name, city, email address, and any other values. The best part is that Google Forms allows you to enable response validation for Number, Text, Length, Regular expressions. To do that you need to hit the three-dot icon in the bottom right of your question and hit Response validation.
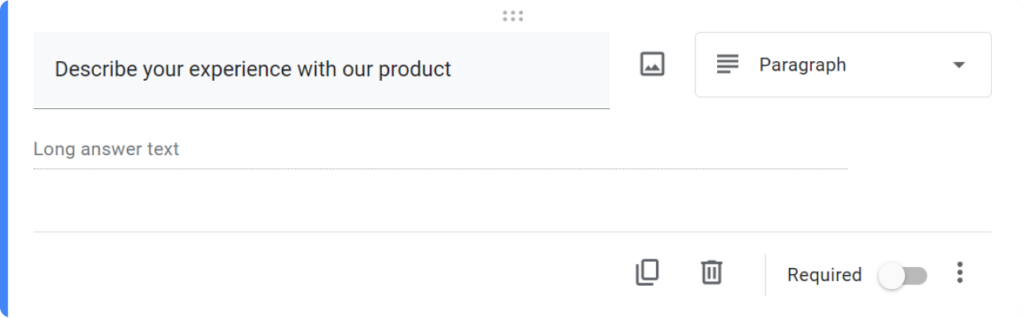
Paragraph: The main purpose of the field is insignificantly different from Short answers. Paragraphs are mainly used for long-form text. Note that paragraphs are supposed to be used for detailed responses with a significant amount of text. Moreover, the response validation can only be applied to length and regular expressions.
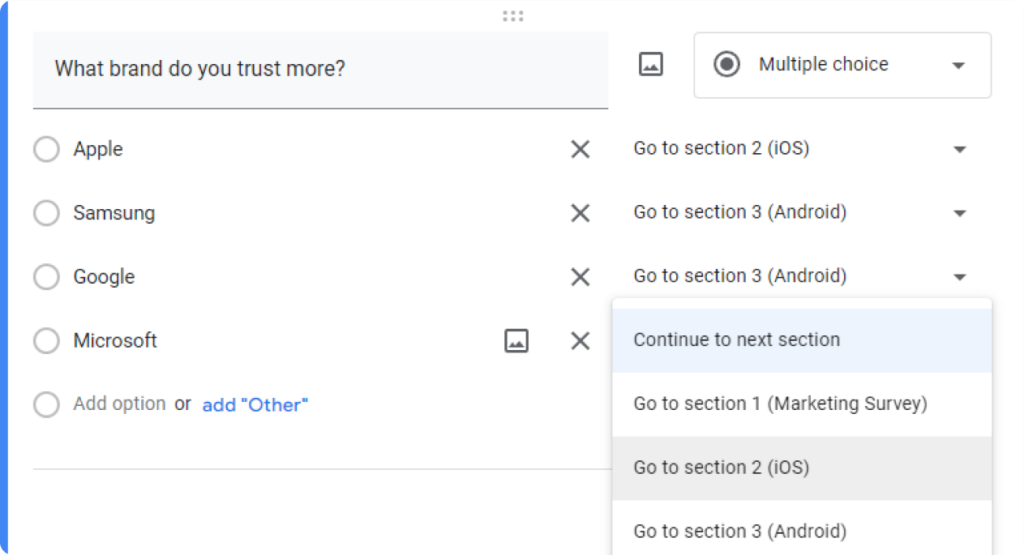
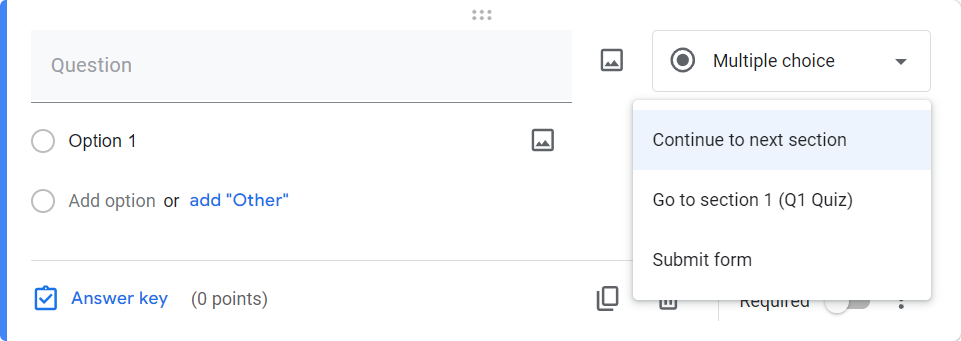
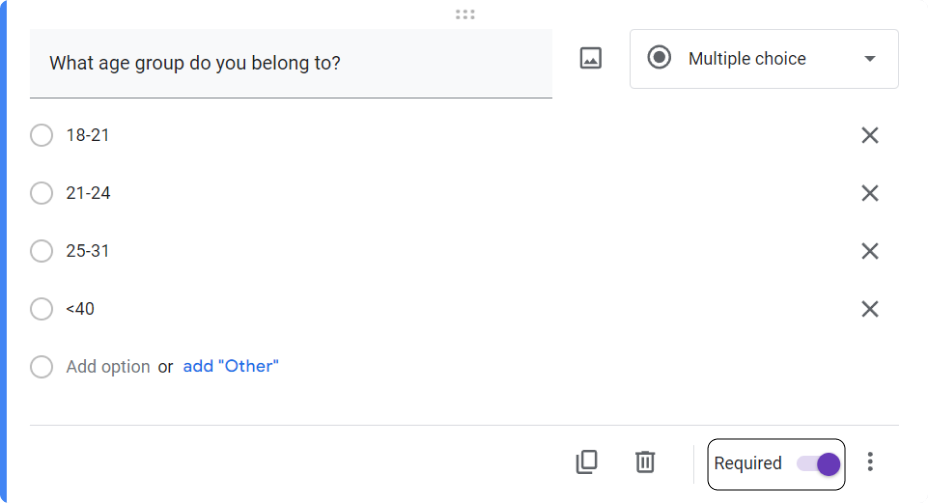
Multiple choice: This option is widely used in quizzes. It let’s you add options and allows your respondents to select one. By hitting the three-dot icon in the bottom right you can customize additional settings. Multiple choice questions can have a shuffled order. You can also send the respondents to the specific section based on their response.
Checkboxes: This option is closely related to the previous multiple choice questions. But in this case it allows your respondents to select a number of options. As multiple choice questions you can set response validation.

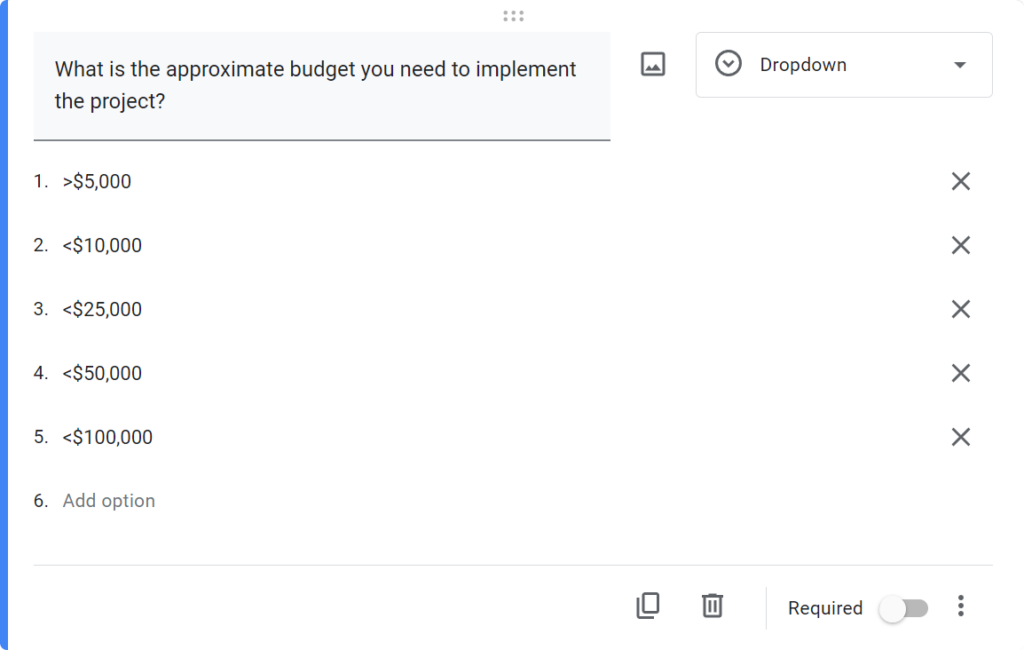
Dropdown: This option is almost the same as multiple choice but this one is used when you have too many options and you want to keep the compact format of your survey/quiz/etc.
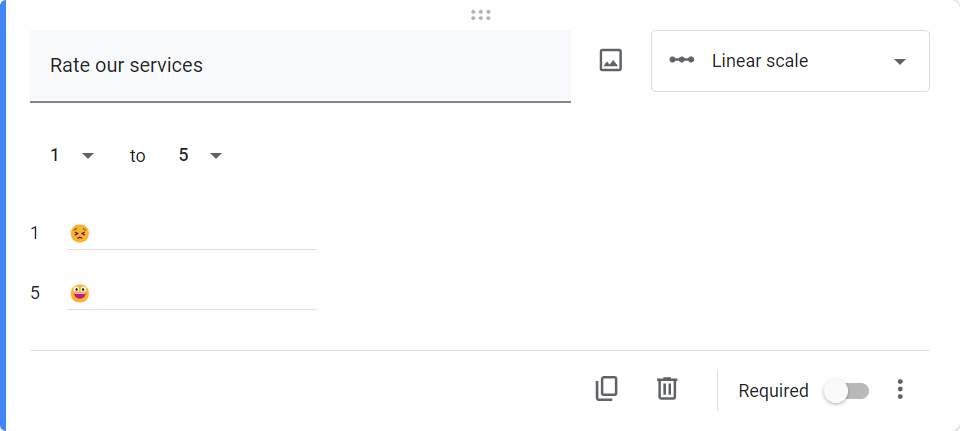
Linear scale: This field lets your respondents to select a number within a range. For instance, it might be useful for collecting ratings, opinions, etc.
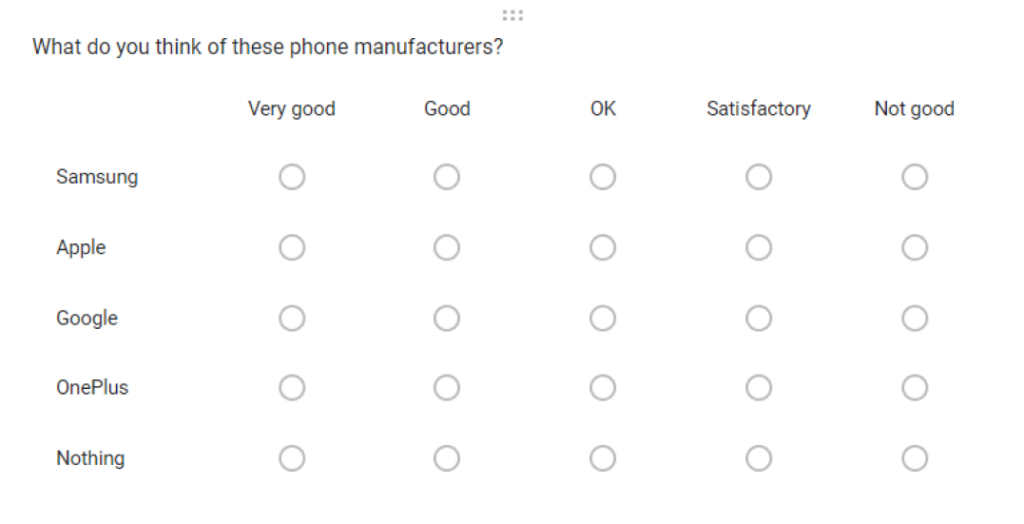
Multiple choice grid: This field allows your recipients to quickly respond to multiple points with the need to go through each question. At first, it may seem quite confusing but in reality it’s just a list of points and possible solutions. It is especially good to learn about the opinion of the users about different matters. This way, for instance, you can find out about the opinion and preferences of your audience. The field allows you to include multiple rows and columns but the average desktop screen is capable of packing only six points for the rest of the points the users will have to scroll down the page.

Checkbox grid: This option has almost the same logic as multiple choice grid. However, with this one your respondents get to chose several available options. You can also limit the respondents to one answer per row. This field works best for various polls and comparison questions.

Date: If you want to schedule a meeting or any other date-dependent event, this field is the solution for you. Using this field your users can book a meeting, add their date of birth, and more.
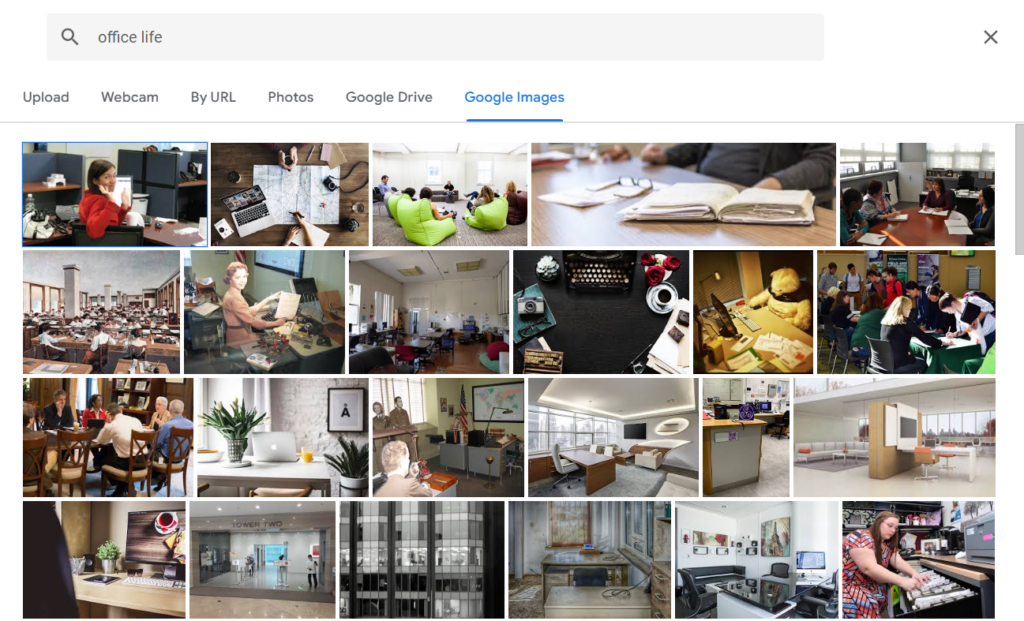
Image: You can also support your forms with various images. You can upload them or insert them from your Google Drive. There is also an option to search the image you need in Google Images. Google Forms also allows you to use the images from your Google Photos app.
Video: Search any video on YouTube or add a URL to your video. The feature can be used for providing descriptive instructions to your respondents.
How to change the design of your Google Forms
Another thing to keep in mind is about customizability of your forms. Google Forms provides you with an option to customize your forms to your needs. There is a range of features you can easily edit from theme color to fonts. There are obvious limitations in terms of what you can possibly do but you can still make your forms stand out and reflect the topic.
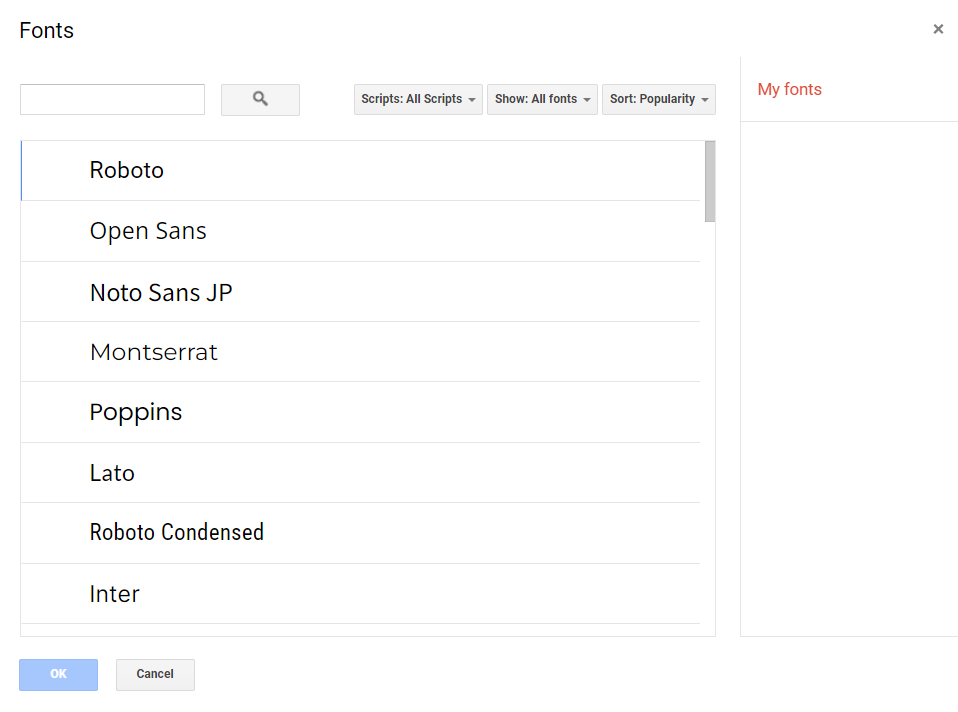
The first thing that you can adjust is the Header font — you can select the font type and the size. By clicking More fonts you can research Google’s Font library and find more font options. You can also select a different font and font size for Questions. The main text can also be adjusted.
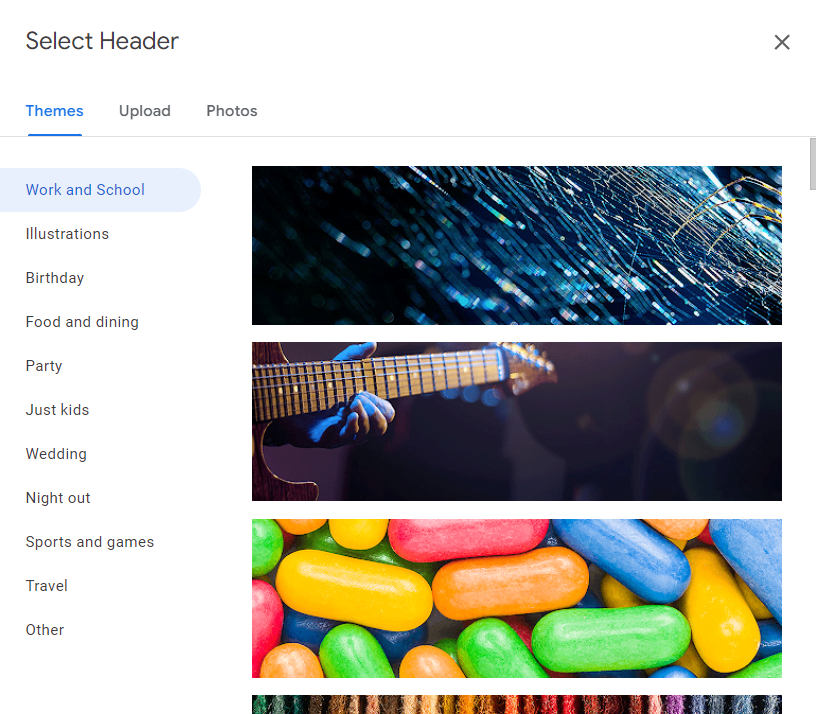
You can select the image for your header and adjust the main color and the background color.
How to create a quiz in Google Forms
Google Forms are widely used in the area of education since it conveniently allows you to create quizzes for different needs. You can test the knowledge of your students, collect feedback, and so much more. To create your first quiz, you need to follow the steps:
- Go to Google Forms and sign in with your Google account.
2. Hit Template menu in the top right corner.
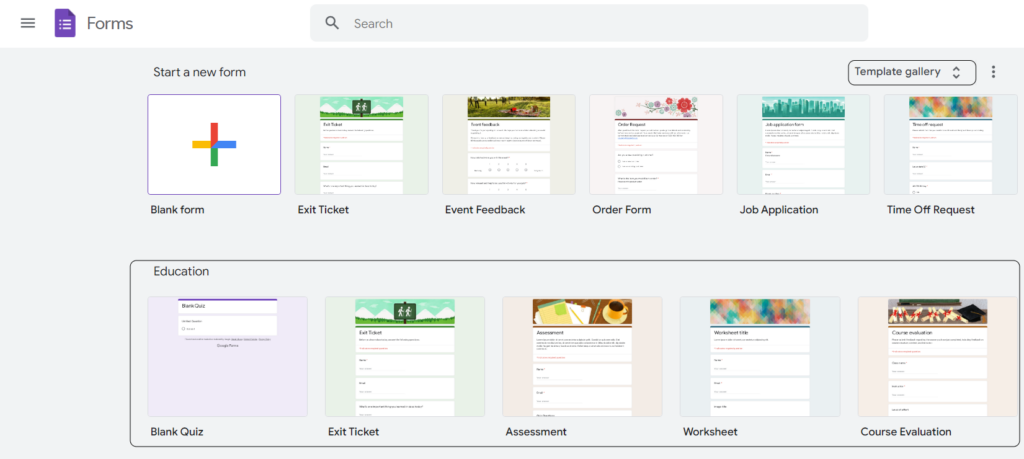
3. Scroll to the Education section and open Blank Quiz. You can also choose from other quiz templates if you like.
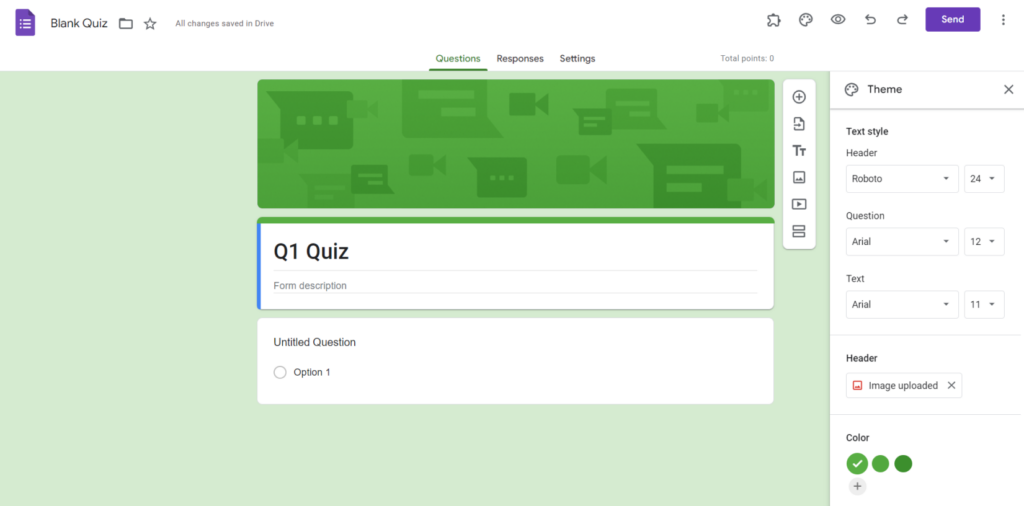
4. Give your quiz a title and a relevant description. You can also change the theme or font of your quiz by clicking on the Customize button (the palette icon) at the top right.
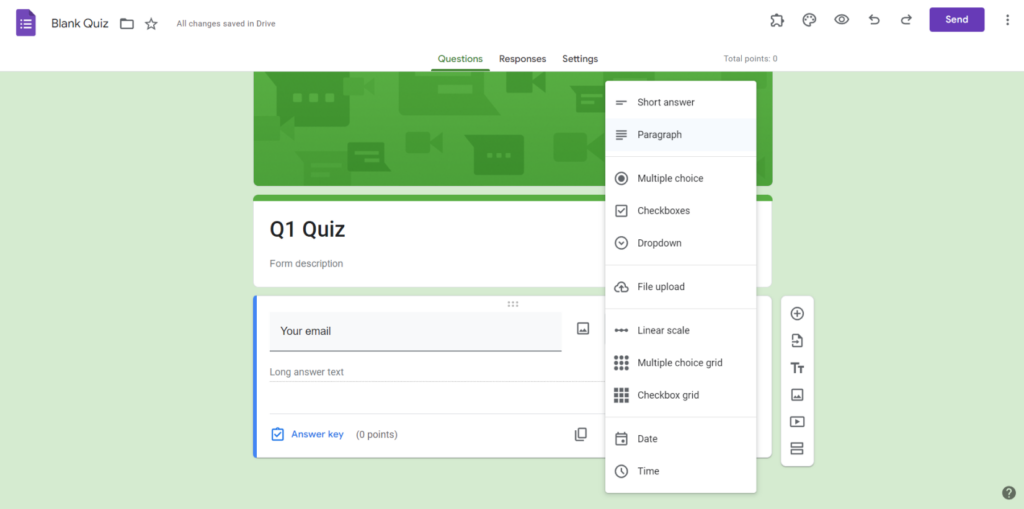
5. Click on Add question and choose the type of question you want. You can use multiple choice, checkbox, short answer, paragraph, dropdown, linear scale, multiple choice grid, checkbox grid, date, or time questions. You can also add images or videos to your questions by clicking on the Add image or Add video buttons.
6. Enter your question and the possible answers. You can also make a question required by toggling the Required switch at the bottom right of the question.
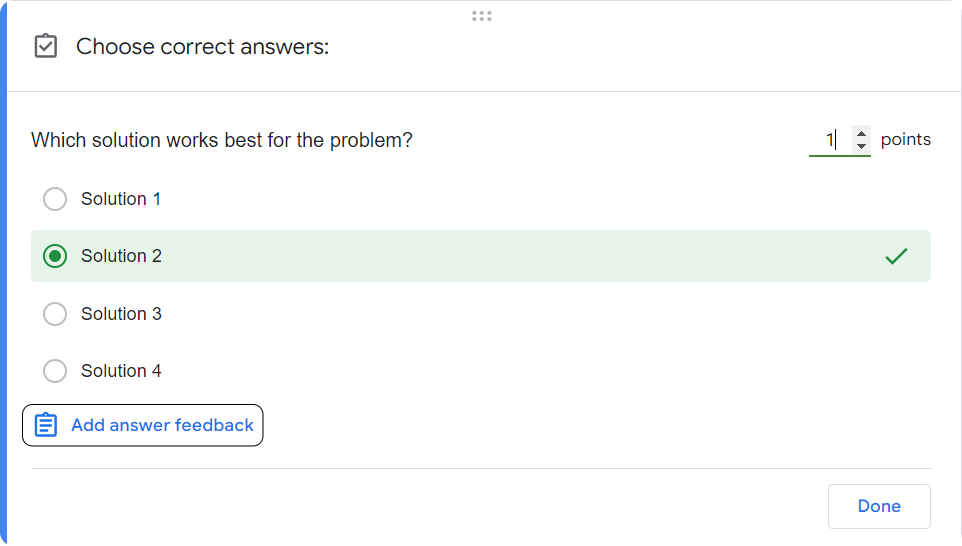
7. To specify the correct answer, assign points, or provide feedback, click on the Answer key at the bottom left of the question. You can choose the answer or answers that are correct, set the point value for the question, and add a written. (TIP: You can use YouTube video explanation for the answer.)
8. To preview your quiz, click on the Preview button (the eye icon) at the top right. You can also send your quiz to respondents using email, a link, or an embed code by clicking on the Send button at the top right. You can also share your quiz with other collaborators by clicking on the Add collaborators button at the top right.
9. To grade your quiz and see the responses, click on the Responses tab at the top of your quiz. You can see a summary of the responses, individual responses, or download the responses as a spreadsheet.
PRO TIP: Install a form notification plugin and set up custom email notifications to preview the results in your emails without going to the Google Forms website
Additional Quiz Settings
As we’ve already pointed out Google Forms is a great solution for quizzes. On top of that, there are additional settings that you can use to adjust your quiz to your needs. To customize your form and add these features you need to go to the Settings tab and hit Make this a quiz.
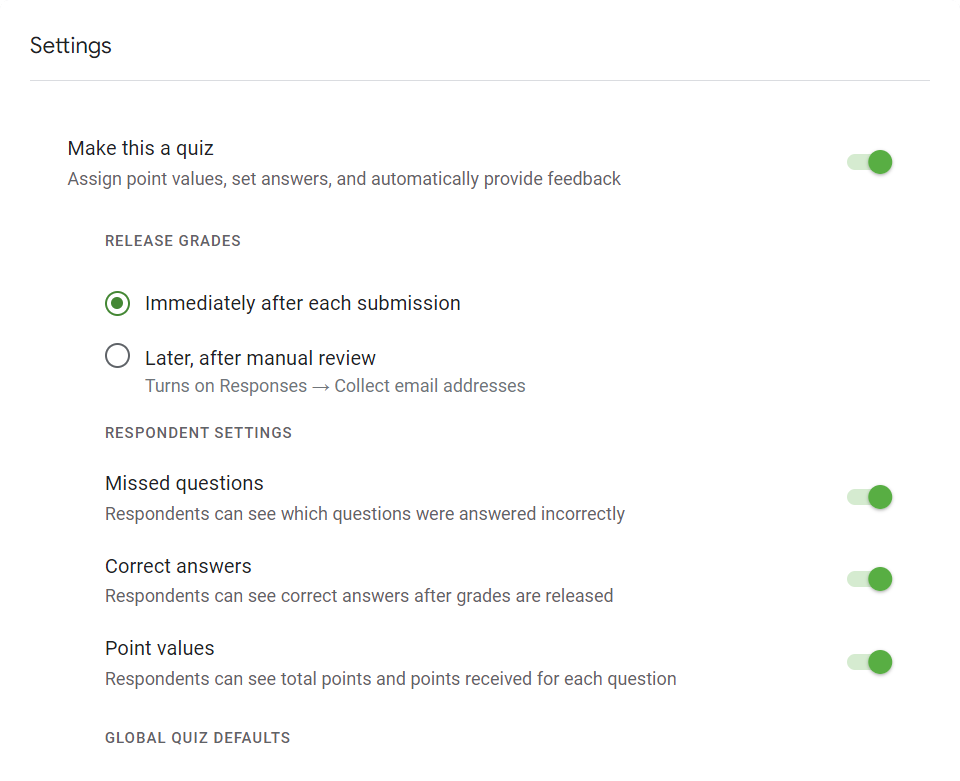
You can now turn on the option to email the respondents their grades and feedback. You can select the option to email them Immediately after each submission or Later, after manual review.
You can additionally set up if respondents can see which questions were answered incorrectly. You can allow them to access the correct answers after finishing the quiz.
Finally, Google Forms allows you to let the respondents see total points and points received for each question. Keep in mind that you need to make sure you entered the point value for each question.
How to create a survey in Google Forms
Apart from quizzes, Google Forms are widely used for surveys. Google Forms is a great tool for creating online surveys and collecting feedback from your audience. You can use different types of questions, customize the appearance of your survey, and share it with others easily. Below, you can find some steps to create a survey in Google Forms:
- Go to Google Forms and sign in with your Google account.
2. You can create a blank form (the + button) or you can go to the template library and adjust the template to your needs.
3. Give your survey a title and a description. You can also change the theme, font, and color of your survey by clicking on the Customize (the palette icon) theme button at the top right.
4. Click on the Add question button to add a new question to your survey. You can choose from multiple choice, checkbox, short answer, paragraph, dropdown, linear scale, multiple choice grid, checkbox grid, date, or time questions. You can also add images or videos to your questions by clicking on the Add image or Add video buttons.
5. Enter your questions and the possible answers. You can also make a question required by toggling the Required switch at the bottom right of the question.
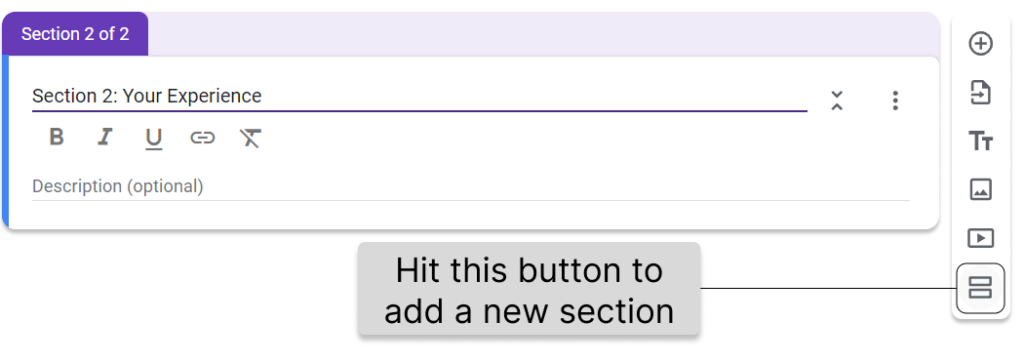
6. You can also add sections to your survey by clicking on the Add section button on the right side of the toolbar. Sections can help you organize your survey into different topics or categories.
7. To preview your survey, click on the Preview button (the eye icon) at the top right. You can also send your survey to respondents using email, a link, or an embed code by clicking on the Send button at the top right. You can also share your survey with other collaborators by clicking on the Add collaborators button at the top right.

8. To see the responses to your survey, click on the Responses tab at the top of your survey. You can see a summary of the responses, individual responses, or download the responses as a spreadsheet. You can also turn on the option to email the respondents their responses by clicking on the Settings button at the top right and then going to the Presentation tab.
How to receive form alerts on your Google Forms results
When you’ve created your form, your responses will be automatically stored in the Responses tab. In this tab you can review the Summary of your form, have a look at the Insights, Scores and overall statistics related to each question.
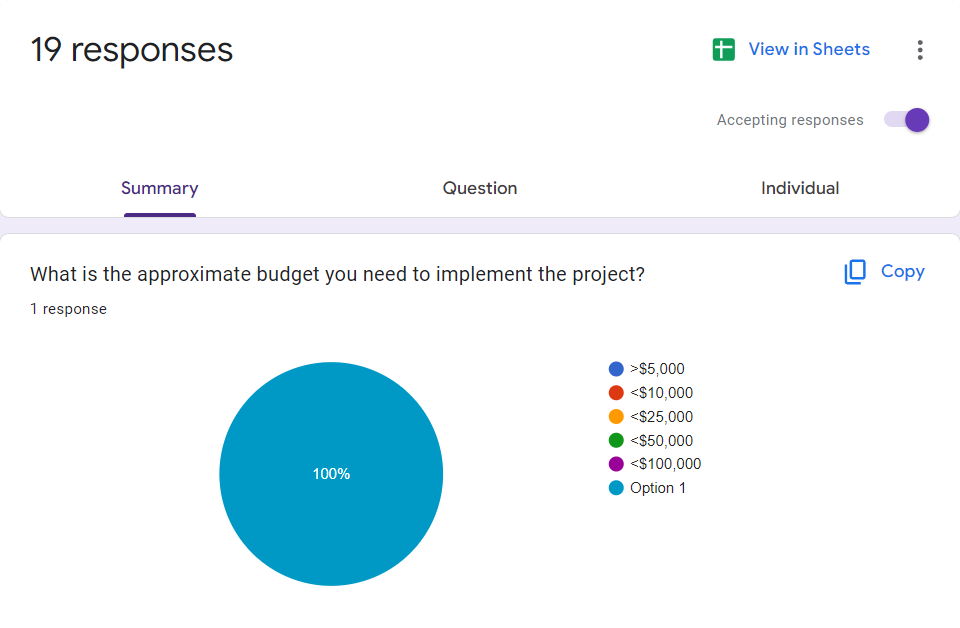
In the Question tab you can analyze each question separately. For individual review of the responses you need to go the Individual tab.
There is also a function that allows you to view all the results in Sheets. You can simply hit View in Sheets button to access a spreadsheet with the results of your form.
How to receive email notifications for Google Forms responses
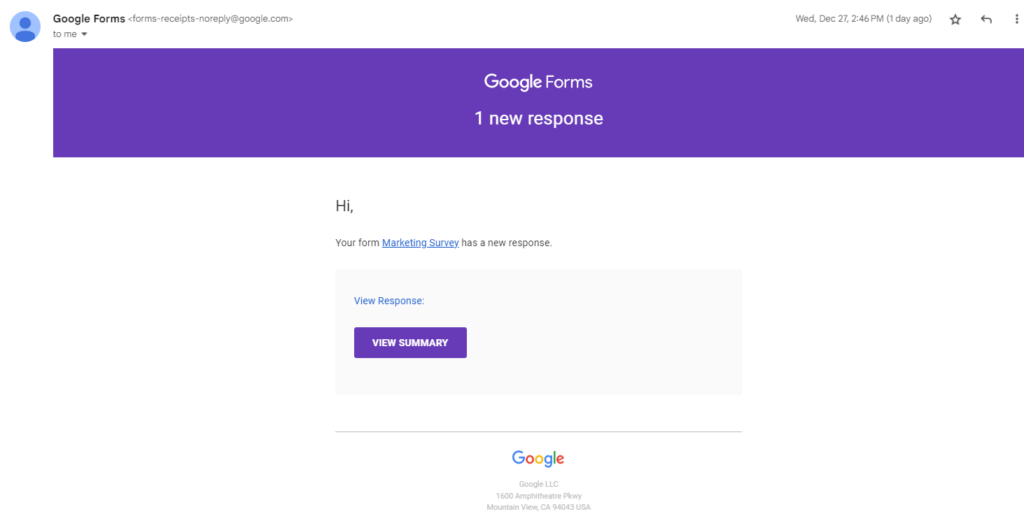
Google Forms has a built in notifications system that allows you to receive emails each time someone completes your form. By default you will only see the following message:
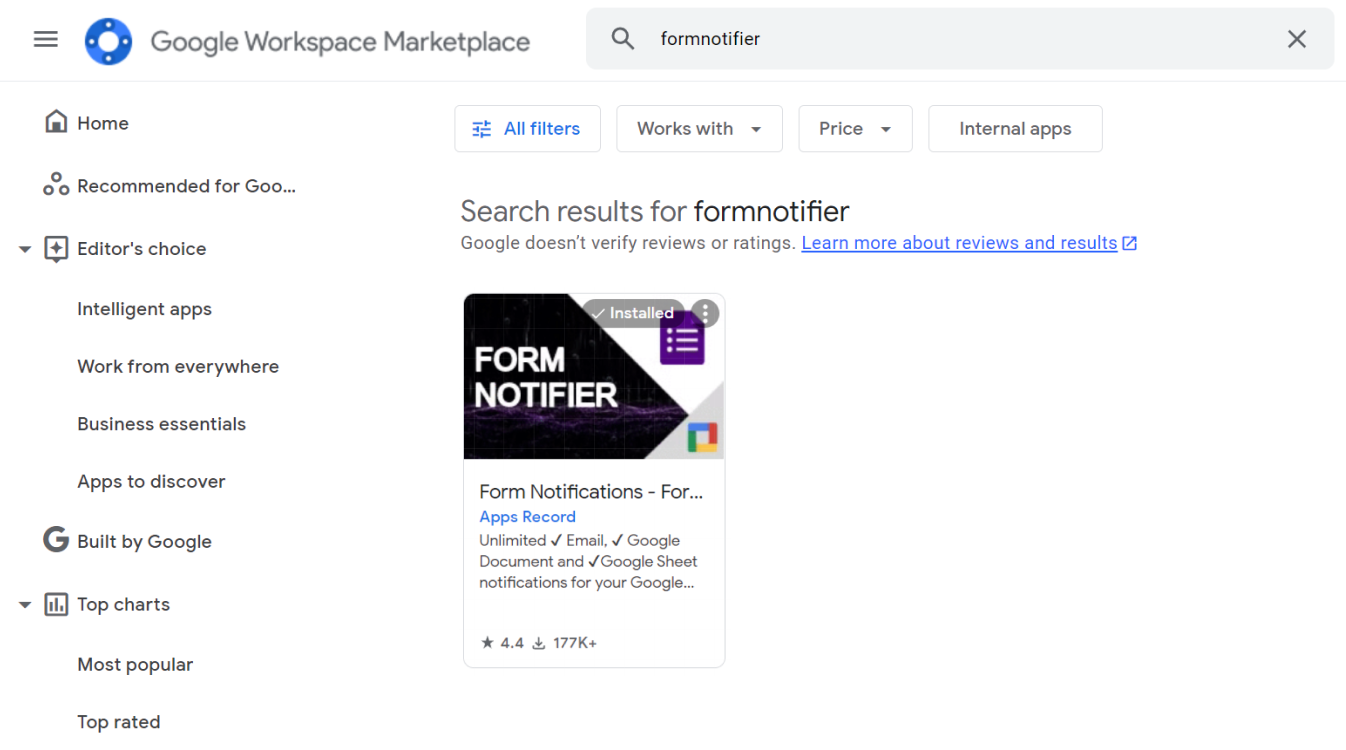
The default form alerts are obviously quite basic and doesn’t allow you to properly analyze your responses without going to the Google Forms website. However, there is a solution for the problem in the form of the third-party plugin from Google Workspace Marketplace that you can use to set up proper email notifications to your needs. One of the best available solutions in the market is Form Notifier by Apps Record. It is totally free and you get a range boundless features. Here is how email notifications created using Form Notifier may look like:

Check out our lates article about notifications for Google Forms. Learn more about the installation process, use cases, and how you can benefit from using the form notification tools.
What are the benefits of Form Notification Plugins?
Among the key benefits of Form Notifier are the following aspects:
Instant Notifications with Details
Save your time
Get only the relevant notifications
Collaborate with your colleagues
Customizability
How to get FormNotifier?
Form Notifier is a solid solution that allows you to set up customizable email notifications or form alerts for your Google Forms. The plugin is available in Google Workspace Marketplace. To get Form Notifier you can follow the steps:
- Go to Google Workspace Marketplace.
- You access it by going to your Gmail.
- Hit the six-dot icon in the top right corner.
- Scroll all the way down to the bottom.
- Click More from Google Workspace Marketplace.
- Search for Form Notifier.
- Hit Install.
How to save Google Forms responses in a spreadsheet or Google Docs
By default Google Forms allow you to generate a spreadsheet in Google Sheets with all the results of your survey. To do that you need to:
- Go to your Google Forms and open the form that you want to copy to a spreadsheet.
- Go to the Responses section.
- Click on the View in Sheets button.

If you want to collect the responses in the form of separate files and store them in your Google Drive you should use Form Notifier. You can create a trigger for the specific notifications and the files containing the results will be automatically generated. The same procedure works for Google Docs.